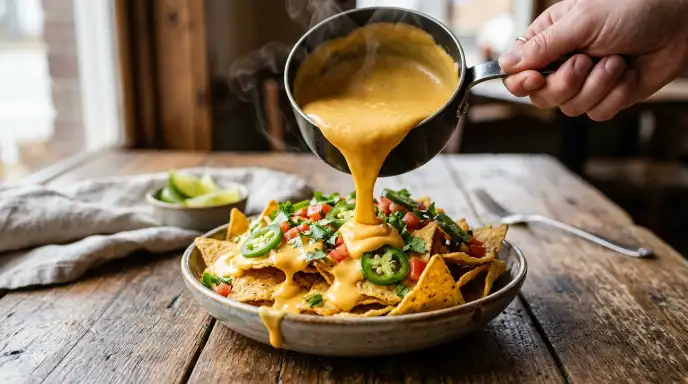
This vegan cheese recipe is the one that made me stop buying store-bought dairy-free cheese altogether.
It’s creamy, cheesy, and ridiculously easy to make.
If you’ve ever been disappointed by rubbery vegan slices, this homemade version will absolutely change your mind.
Perfect for beginners and longtime plant-based eaters alike.
The Best Vegan Cheese Recipe – Creamy, Melty & So Easy
Recipe Overview
| Detail | Value |
| COURSE | Sauce / Spread |
| CUISINE | American |
| DIFFICULTY | Easy |
| SERVINGS | About 1½ cups |
| PREPARATION TIME | 10 minutes |
| COOKING TIME | 5 minutes |
| CALORIES | ~90 per 2 tablespoons |
Got extra vegan cheese? Try using it in this tasty vegan chili recipe for a warm and satisfying meal.
Equipment Needed
- High-speed blender
- Small saucepan
- Whisk
- Rubber spatula
- Measuring cups and spoons
- Airtight container for storage
Ingredients
For the creamy base:
- 1 cup raw cashews (soaked 4 hours or quick-boiled 15 minutes)
- ¾ cup unsweetened oat milk (or almond milk)
- 3 tablespoons nutritional yeast
- 1 tablespoon lemon juice
- 1 teaspoon apple cider vinegar
- ½ teaspoon garlic powder
- ½ teaspoon onion powder
- ½ teaspoon salt (adjust to taste)
- 1 tablespoon tapioca starch (for stretch and melt)
Optional flavor boosts:
- ½ teaspoon smoked paprika for a smoky vibe
- 1 teaspoon Dijon mustard for sharpness
- Pinch of turmeric for color
- 1 tablespoon olive oil for extra richness
Substitutes & Variations:
- Swap cashews for blanched almonds (texture slightly different)
- Use soy milk for higher protein
- Skip tapioca starch for a pourable cheese sauce
- Add jalapeños for spicy queso
Step-by-Step Instructions
1. Soak your cashews.
If you didn’t soak them overnight, boil raw cashews for 15 minutes until softened.
Drain and rinse well.
Tip: Soft cashews blend smoother and give that ultra-creamy finish.
2. Add everything to the blender.
Place soaked cashews, oat milk, nutritional yeast, lemon juice, vinegar, garlic powder, onion powder, salt, and tapioca starch into your blender.
3. Blend until silky smooth.
Blend on high for 1–2 minutes until completely creamy with no grit left behind.
This is where your vegan cheese recipe starts looking magical.
4. Taste and adjust.
Add more salt, lemon, or nutritional yeast depending on how cheesy you like it.
5. Transfer to a saucepan.
Pour the blended mixture into a small saucepan over medium heat.
6. Whisk constantly.
Stir continuously for 3–5 minutes as it heats and thickens.
Tip: Don’t walk away — it thickens quickly once the tapioca activates.
7. Watch it transform.
The mixture will go from creamy to glossy and stretchy.
That’s when you know your vegan cheese recipe is ready.
8. Remove from heat.
Turn off the heat once thick and smooth.
9. Use immediately or set.
For a dip-style sauce, serve warm right away.
For sliceable cheese, pour into a small dish and refrigerate 2–3 hours to firm up.
10. Store properly.
Keep leftovers in an airtight container in the fridge for up to 5 days.
Reheat gently to restore that melty texture.
Ideas for Serving
This vegan cheese recipe is wildly versatile and works in so many meals.
- Drizzle it over nachos, tacos, or baked potatoes for instant comfort food vibes.
- Spread it on burgers or sandwiches for a creamy dairy-free upgrade.
- Toss it with hot pasta for an easy plant-based mac and cheese.
- Pour it over steamed broccoli to make vegetables actually exciting.
- Use it as a pizza sauce base for a rich, melty topping that stretches beautifully.
Nutrition Information
| Nutrient | Amount (Per 2 Tbsp) |
| Calories | ~90 kcal |
| Protein | 3g |
| Fat | 7g |
| Carbs | 5g |
| Fiber | 1g |
| Sodium | 160mg |
This cheese sauce is packed with healthy fats from cashews and contains zero cholesterol.
Nutritional yeast adds B vitamins and that signature savory flavor that mimics traditional cheese.
Compared to many store-bought vegan cheeses filled with oils and stabilizers, this homemade version uses whole-food ingredients you can actually pronounce.
It’s satisfying, creamy, and much lighter than dairy-based cheese sauces.
Common Mistakes to Avoid
- Not soaking cashews long enough, resulting in gritty texture
- Skipping tapioca starch if you want a stretchy melt
- Overheating and not whisking, which can cause clumping
- Adding too much liquid at once
- Forgetting to taste and adjust seasoning
- Storing uncovered, which dries it out
Conclusion
Making your own vegan cheese recipe at home is honestly a game changer.
It’s cheaper, fresher, and tastes way better than most store options.
Plus, once you see how simple it is, you’ll start putting it on everything.
From nachos to pasta to burgers, this creamy sauce delivers that comforting cheesy flavor without any dairy.
Try it once and you might never go back to the packaged stuff again.
FAQs
Can I make this vegan cheese recipe without cashews?
Yes.
You can use blanched almonds or even sunflower seeds, though the flavor will change slightly.
Does it really melt like real cheese?
Thanks to the tapioca starch, it gets stretchy and glossy when heated.
That’s what gives this vegan cheese recipe its melt factor.
Can I freeze it?
It’s best fresh, but you can freeze it.
Texture may change slightly when reheated.
How long does it last in the fridge?
Store in an airtight container for up to 5 days.
Reheat gently on the stovetop or microwave.
Can I make it thicker for slicing?
Yes.
Reduce the milk slightly and refrigerate longer to firm it up into a spreadable block.